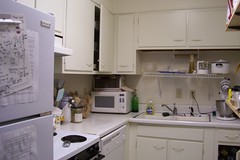
I apologize for the long absence, but quite frankly cooking in my kitchen has been painful. Since I don’t have AC, the apartment has poor air circulation, and my kitchen is windowless, not only is it hotter overall in the apartment than outside, but the kitchen with the oven on reaches nightmarish temperatures. At least, I know I’m not the only one because when I called Ursula about having dinner this week, she said the same thing. But we decided to persevere anyway and do some cooking. Last night wasn’t as hot as it has been but that’s not saying much. I made a Rosemary Roast Chicken and the Trifle and Steve and Ursula (McShaggart) made Potatoes Anna and a Salad with Eggless Caesar Dressing. It was a really good meal, and I’ll blog about my chicken someday. Today I want to talk about the dessert.
I’ve had Nigella Lawson’s
How to be a Domestic Goddess since I was in high school, but I’ve only ever used a handful of the recipes. They all look good, but I’ve never been much of a baker or a dessert person. In the spirit of scientific inquiry, I stepped out of my comfort zone and made something new. Interestingly enough, Ursula told me that she thinks I make more new things than she does. It’s probably true because while she’s clearly mastered Potatoes Anna to the point where it’s a bit of a dinner party staple, I almost always make something I’ve never made before for potlucks or parties. I guess we all just have different definitions of comfort zones.
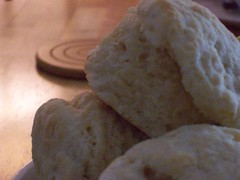
How did I change the recipe (since I pretty much always end up doing something slightly different)? Well Lawson’s recipe calls for the cake to be made in a loaf pan, but I thought individual ramekins would look really neat which also cut down on the cooking time. I couldn’t find self-rising cake flour so I used pastry flour. Pastry flour has more protein than cake flour but less than all-purpose flour which means cakes made with pastry flour tend to be a bit less delicate and crumbly. However, you can offset that effect by careful handling of the batter and eggs. I used cream instead of milk in the cake because I was out of milk and had already bought the cream. Oh and the dry sherry at Bloomingfoods was ten dollars more than the medium, so I bought the medium and reduced the sugar in the syllabub. Bloomingfoods was also out of large eggs, but I checked an equivalency chart and you can use medium eggs 1:1 with large if you’re only using two.
It was pretty easy, although a bit time consuming to make. To line the ramekins trace the bottoms on parchment paper with a pencil, cut out, and then cut out strips wide and long enough to go around the insides. When using pastry flour instead of cake, mix the batter as little as possible and separate the eggs, beat the whites, and fold them into the batter. Oddly enough when I made the
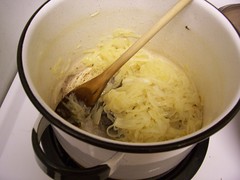
syllabub (fun word!) the cream seized up but it left a lot of remaining liquid. Which left me confused and wondering if I’d somehow made butter, but I clearly hadn’t so I just drained off the excess liquid and served it as it was. I don’t think I poured everything in slowly enough if that gives any hints.
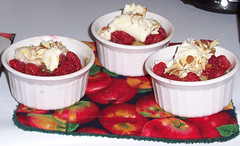
Lemon Raspberry Trifle
Cake:
½ C unsalted butter
½ C plus 1 T sugar
2 eggs, separated
zest of one lemon
1 C plus 1 T pastry flour
pinch of salt
3 T cream
1 T water
Syrup:
juice of 3 lemons ~8 T (I used half concentrate here)
1 C confectioners’ sugar
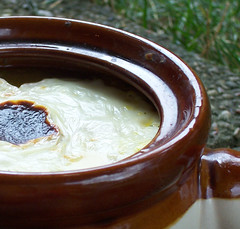
Preheat the oven to 350 F. Butter and line the pans with parchment paper. Whip the egg whites in a different bowl. Cream together the butter and sugar. Beat in egg yolk and lemon zest. Fold in the whites. Fold in the flour and salt and then the milk. Spoon evenly into ramekins. Bake 30-35 minutes until golden, risen in the middle, and a cake tester comes out clean. While it’s baking, whisk together juice and sugar to make the syrup. Once the cake is done immediately puncture holes in the top with your cake tester (I used a cheap steak knife) and pour the syrup evenly into ramekins. Once cool remove paper. If there is excess syrup that hasn’t absorbed, pour it off and then flip the cakes out of the ramekins to remove the bottom sheet of parchment paper. Pour the syrup back in once the cake is returned.
Syllabub:
8 T dry sherry
3 T sugar
juice and zest of 1 lemon
1 1/3 C heavy cream
pint raspberries
2 T sliced almonds, toasted
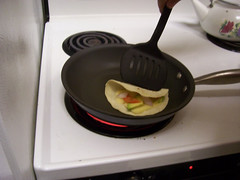
Mix sherry, sugar and lemon. Let sit for and hour to completely dissolve or whisk really hard at the beginning. Slowly add the cream and whisk until airy and bulky. To toast almonds place them in a dry frying pan over medium high heat until golden and aromatic. Top cake with raspberries, syllabub, then almonds. Made four very rich servings which could’ve been shared between two people each.